A couple weeks ago, I took one of the most energizing classes I’ve yet to experience. Sorry, library school, but my Southeast Asian street food cooking class at Tante Marie�s was more exciting than User Needs and Behavior in Theory and Practice (which, um, actually was one of my favorite classes—yeah, I realize that makes me a nerd).

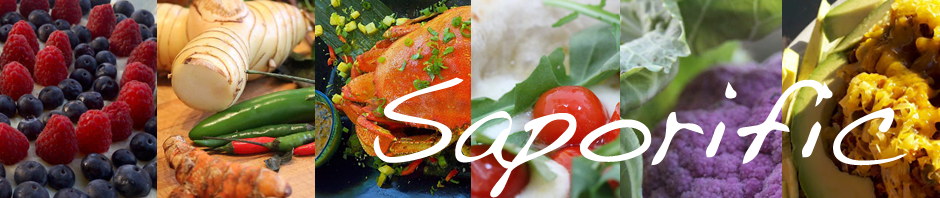
Clockwise from bottom left: Turmeric root, galangal, Vietnamese coriander, serrano peppers and bird's eye chili peppers
At the start of the class, our instructor, Jen Knapp, gave us a great intro to the standard South Asian ingredients we�d be using, including Vietnamese coriander, turmeric root, shrimp paste, lemongrass, dried shrimp, tamarind, and palm sugar, just to name a handful.
Following Jen�s intro to ingredients and assignment of recipes, a temporary span of organized chaos ensued when she set us free with, “Okay, find your ingredients and a work space!” I�ll admit this was daunting at first (huh? where are the knives in this kitchen I�ve never been in before?), but we all figured things out pretty quickly with the help of Jen and her assistant. Throughout the class—incidentally, the speediest passing of five hours I�ve experienced in a long time!—Jen called everyone over to watch techniques that weren’t necessarily obvious from the recipe (e.g., rolling spring rolls, deveining shrimp, making tamarind pulp, the quick succession of Pad Thai stir frying). Even though we all only made one or two things ourselves, I feel confident about attempting any or all of the recipes at home.
As one might expect, eating the food we cooked was the highlight of the day. Every dish that was prepared was distinctive, yet contained all of the elements of the region�s cooking (salty, sweet, sour, hot) that makes southeast Asian food so intensely flavorful. After all the cooking was done, we all sat down, poured some wine, and tried all of our food creations, finishing off with my favorite Thai dessert of sticky rice with mango. We sat there stuffing ourselves, dreaming of starting food carts, and wishing we had more room in our stomachs…

Pad Thai
Pad Thai was the recipe I ended up being responsible for in the class, I think because I mentioned that my husband has been on a quest of his own to make perfect Pad Thai. Since the name basically means “Thai noodles” there’s no definitive recipe, I suppose. I can say for the record that this recipe is by far my favorite, and I have tried many a version at excellent Thai restaurants (and some excellent attempts by Dan!). I’ve now made this three times on my own, even transporting the difficult-to-find ingredients to North Carolina to make it for my mom and sister! I’ve tweaked it just a little from the recipe in class, but everyone I’ve made it for thus far has been pretty smitten with it. My friend Jon, who experienced my first home attempt (in which I even forgot the bean sprouts), said that he never orders Pad Thai at restaurants, not because he doesn’t like it, but because he enjoys other Thai dishes more. This version, however, he says he’d order!
Recipe: Pad Thai (or Padd Thai)
Summary: adapted from Jen Knapp’s adaptation of a recipe from Chez Pim
Ingredients
For the sauce:
- 3/4 cup tamarind pulp (see Notes below)
- 3/4 cup fish sauce
- 3/4 cup palm sugar, chopped
- 1-2 tsp chili powder, such as Thai chili or chile de arbol (not to be confused with the spice blend you’d put in chili or tacos)
For the noodles:
- 16 oz dried 1/4-inch wide rice noodles, soaked for 10-15 minutes in hot water until al dente, then drain and coat with a little vegetable oil to keep them from sticking together
- vegetable oil, for stir frying
- 1 package extra firm tofu (or super firm, if you can find it), drained, pressed (if necessary), and cut into thin, bite-sized pieces
- 6 eggs
- 6 tbsp garlic, minced
- 6 tbsp chopped pickled turnips (optional, but awesome if you can find them)
- 6 tbsp unsalted, dry roasted peanuts, chopped (plus more for garnish)
- 6-8 tsp dried shrimp, pounded with mortar and pestle until fluffy
- 6 cups bean sprouts
- 2 cups garlic chives (or regular chives if you can’t find garlic chives), cut into 2-inch strips
- 1-2 limes, cut into wedges (for garnish)
Instructions
The key to this dish is getting everything prepped in little bowls right next to your wok, since you�ll want to just throw in ingredients in quick succession once the wok is super hot. Don�t worry about measuring exactly—just try to make sure you use about the same amount in each batch so that everyone gets all the ingredients! By the time you�ve made the last serving, you�ll be a pro!
For the sauce:
- In a medium saucepan, cook the tamarind pulp, fish sauce, and palm sugar over medium heat until the ingredients have melted together (i.e., the palm sugar has dissolved).
- Add the chili powder a little bit at a time, until it is spicy enough for your tastes. The sauce will be super concentrated—it will be mixed with very bland noodles, so don’t fret if it’s crazy potent!—and you should taste it as salty, mildly sour, then a little sweet, and then a bit hot.
For the noodles (best made in individual servings):
- Heat the wok over high heat, then add a splash of vegetable oil (which will smoke slightly if the wok is hot enough). Immediately add a sixth of the tofu and about a tablespoon of sauce. Cook, stirring frequently, until tofu is slightly brown and crisp (a couple minutes).
- Brace yourself for some rapid-fire cooking! Add a large handful of noodles to the wok, as well as 1/4 cup of sauce. Stir vigorously in order to keep the noodles from sticking, continuously moving everything in the wok. If the noodles are still a little undercooked or if the sauce evaporates too quickly, add a splash of water to help them cook. Once the noodles are cooked (which should only take about a minute), push everything over to one side of the wok and crack an egg in the middle. Mix the egg up a little bit, and after it’s mostly cooked (about 10 seconds or so), mix the noodles and egg together.
- Add 1 tablespoon each of garlic, pickled turnips, and chopped peanuts, a teaspoon of dried, pounded shrimp, a handful of bean sprouts and about a quarter cup garlic chives. Add a little more sauce if you like.
- Cook very briefly, just long enough to heat through and toss everything together. Turn off the heat and serve immediately, garnished with chopped peanuts and wedges of lime.
- Wipe any largish bits of food out of the wok, and repeat with remaining ingredients. Make sure to taste the first batch so you know if it’s any good (and so you can tweak proportions to your taste as necessary).
Notes
There are many tamarind products available, including tamarind paste (which is super concentrated and may need to be diluted to be the ideal concentration). To make tamarind pulp from moist-but-dried tamarind (found in a block at Asian grocery stores), pull off about 3/4 cup of the tamarind from the block and place it in a small bowl. Just barely cover the tamarind in boiling water and let sit for about 15 minutes. Once it’s tolerably cool enough to touch, grab a handful of the tamarind and squish it through your fingers to separate the seeds from the pulp. (It’s definitely messy, but totally fun!) After squishing it as much as you can, press the pulp and liquid through a coarse sieve to separate out the seeds. Voilà! The liquid pulp is ready to use, and you have super messy but tasty fingers.
Variations
The recipe I made at Tante Marie’s included using 1 1/2 pounds of fresh shrimp, which you throw in and cook early on with the tofu. My husband isn’t a seafood fan—and I’m not much of a fan of peeling and deveining shrimp, as it turns out—so I like just using tofu. You could also use bite-sized pieces of chicken or other meat of your choice, as well.
The original recipe calls for more of the dried shrimp as well, but when making it without the fresh shrimp, too much of the dried shrimp made the dish taste a little too “fishy.” Play with proportions to suit your tastes, though!
Preparation time: 30 minute(s)
Cooking time: 5 minute(s) per serving
Number of servings (yield): 6


 It is so hard to find a good caramel. One that makes your eyes soften, your shoulders relax, and provokes an involuntary exhale as the caramel is released from its thin chocolate shell. One that melts like butter when it hits your tongue and engulfs your whole body in blissful warmth as the flavors dance upon your taste buds. To be honest, I don’t think I knew that caramels this good existed before now, though I’d certainly hoped.


")
 D’oh! Didn’t quite think that through before saying the offer out loud! Anyway, thankfully, this pie crust was so flaky and crispy–even the next day, when a wheat crust would be soggy!–Dan conceded that we could wait until Thanksgiving for the next one. So, just in time, I’m sharing how to make it!